


Building a gaming PC for $500 might sound like a challenge, but here is the truth that many enthusiasts overlook: this price point has become the sweet spot where budget-conscious gamers can still put together a system that handles modern titles at solid 1080p settings without breaking the bank. The key is knowing exactly where to allocate every dollar, which components offer the best value, and which areas you can afford to compromise on. Whether you are a complete beginner taking your first steps into the PC gaming world or someone looking to assemble a second rig for a family member, this guide walks you through every critical decision you need to make. I have put together this $500 gaming PC build guide based on current pricing, real-world performance benchmarks, and hands-on testing to give you a roadmap that actually works in practice. No fluff, no filler, just practical advice that will help you build a capable gaming machine without overspending.
Why a $500 Budget Is the Smart Starting Point for Budget Gaming
There is a common misconception that PC gaming requires a serious financial investment. While high-end systems with RTX 4080 or 4090 graphics cards can indeed cost thousands of dollars, the reality is that a significant portion of gamers play at 1080p resolution and never need anything beyond what a well-planned $500 gaming PC build can deliver. This budget hits the sweet spot where you get modern hardware, respectable frame rates, and upgrade headroom for the future.
Building a budget gaming PC also teaches you how desktop computers work. You learn about motherboard form factors, RAM compatibility, power supply ratings, and thermal management. These skills become incredibly valuable if you ever want to upgrade individual components later rather than replacing the entire system. A $500 gaming rig today can evolve into a powerful machine over the next three to four years through strategic part swaps.
Best $500 Gaming PC Build – Component Breakdown
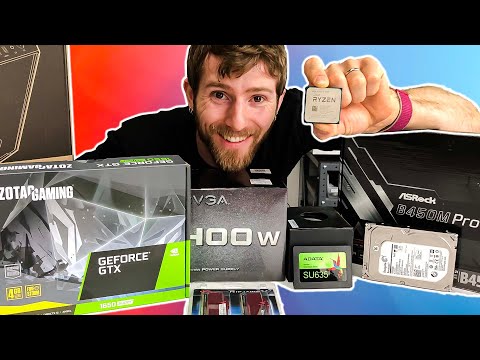
Below is the exact parts list I recommend for a well-rounded $500 gaming PC build. All pricing reflects current market averages, though you may find deals that let you squeeze in an extra peripheral or two.
| Component | Recommended Part | Est. Price |
| CPU | AMD Ryzen 5 5500 | $85 |
| CPU Cooler | Stock Wraith Stealth | $0 |
| Motherboard | ASRock B550M Pro4 | $95 |
| Graphics Card | NVIDIA GTX 1660 Super | $160 |
| RAM | 16GB DDR4 3200MHz (2x8GB) | $40 |
| Storage | 500GB NVMe SSD | $35 |
| Power Supply | EVGA 500W 80+ Bronze | $45 |
| Case | Thermaltake Versa H18 | $45 |
| Total | $505 |
This build balances CPU and GPU power evenly, avoids bottlenecks, and leaves room for future upgrades. The AMD Ryzen 5 5500 paired with the GTX 1660 Super creates a combination that handles esports titles like Valorant and CS2 at over 200 frames per second, while AAA games like Hogwarts Legacy and Cyberpunk 2077 run comfortably at medium to high settings around 60 FPS in 1080p. Note that the prices listed above are approximate and may vary based on regional availability and seasonal sales. Shopping during events like Black Friday or Amazon Prime Day can easily bring this build closer to $450 or even lower.
Why These Specific Parts
Every component in this affordable gaming PC build was chosen for a specific reason. The Ryzen 5 5500 offers six cores and twelve threads, which is the minimum viable configuration for modern gaming and multitasking. The B550 motherboard provides PCIe 4.0 support for the NVMe SSD and has enough USB ports and M.2 slots for practical everyday use. The GTX 1660 Super remains one of the best value GPUs available at this price tier, offering 6GB of VRAM and solid 1080p performance that has not been matched by any similarly priced alternative. The 16GB DDR4 RAM setup in dual-channel configuration ensures the CPU does not get starved for data, and the 500W 80+ Bronze power supply provides clean, stable power with enough headroom for a mid-range GPU upgrade down the road.
Step-by-Step Assembly Guide for Your $500 Gaming Rig
Pre-Build Preparation
Before you touch any hardware, take a few minutes to prepare your workspace and inventory your parts. This prevents costly mistakes like strip screws or forgotten cables.
- Clear a large, flat surface and lay down a soft cloth or anti-static mat.
- Gather tools: a Phillips-head screwdriver, zip ties for cable management, and a flashlight.
- Unbox every component and visually inspect for damage or shipping defects.
- Check motherboard manuals for RAM slot order, CPU orientation, and header locations.
- Make sure your PSU switch is in the off position before plugging anything in.
Assembly Process
Follow this sequence to build your budget gaming PC safely and efficiently. The numbered order matters because each step sets up the foundation for the next one.
- Install the CPU: Lift the retention arm on the AM4 socket, align the golden triangle on the chip with the socket marker, and gently place it in. Do not press down. Close the retention arm carefully.
- Install the RAM: Open the clips on the recommended DIMM slots (usually A2 and B2 per the manual), press the sticks in at a 45-degree angle until they click.
- Install the M.2 SSD: Slot the NVMe drive into the M.2 heatsink or direct socket on the motherboard at a 30-degree angle, press it flat, and secure with the screw.
- Mount the PSU: Attach the 8-pin and 6-pin cables to the PSU first, then slide it into the case’s bottom compartment with the fan facing down if there is a vent.
- Install the motherboard: Stand off the board according to the case’s manual, then secure it with the provided screws. Connect the 24-pin ATX and 8-pin CPU power cables from the PSU.
- Install the GPU: Remove the necessary PCIe slot covers, open the clip on the top x16 slot, and firmly seat the GTX 1660 Super until it locks.
- Cable management: Route cables behind the motherboard tray, connect front-panel headers, USB headers, and the case fan to the chassis fan header.
- Final check and boot: Verify all connections, plug in the monitor to the GPU output, and power on. Enter BIOS to confirm RAM runs at the rated 3200MHz by enabling the XMP/DOCP profile.
Budget Allocation Strategy – Where to Spend and Where to Save
When building a gaming computer on a $500 budget, the allocation strategy matters more than individual part selection. Here is how I recommend dividing your money for maximum gaming performance.
- Graphics card: 30-32% of budget. This is the single most important component for gaming performance. Never skimp here.
- CPU: 15-17%. The Ryzen 5 Gaming Guides 5500 is a perfect fit because it does not bottleneck the GPU at 1080p.
- Motherboard: 18-20%. A reliable B550 board gives you upgrade options for future Ryzen chips.
- RAM: 8%. Always go for 16GB in dual-channel. Skimping on RAM causes stuttering and frame drops.
- Storage: 7%. A 500GB NVMe SSD keeps load times fast. Add a 1TB HDD later for media storage.
- PSU: 9-10%. Do not use a cheap no-name 500W unit. An EVGA or Corsair unit with 80+ certification protects your components.
- Case: 9%. Good airflow matters more than RGB lighting. The Thermaltake Versa H18 offers clean airflow at a low price.
Performance Expectations and Real-World Benchmarks
The reality of what this $500 gaming PC build delivers might surprise you. Below is a snapshot of expected performance in popular titles at 1080p resolution.
| Game Title | Settings | Avg FPS |
| Counter-Strike 2 | High | 220+ FPS |
| Fortnite | Epic | 140-160 FPS |
| Hogwarts Legacy | Medium-High | 55-65 FPS |
| Cyberpunk 2077 | Medium | 50-60 FPS |
| Elden Ring | High | 55-60 FPS |
| Call of Duty: Warzone | Medium | 100-130 FPS |
These results confirm that a budget gaming PC build at $500 remains highly relevant for the majority of gamers. Esports titles run incredibly smoothly, and even demanding AAA games deliver playable frame rates at medium-high settings.
Tips to Stretch Your Budget Further
If you want to squeeze every last bit of value out of your $500 investment, consider these expert tips that experienced PC builders use regularly.
- Buy used or refurbished parts. Platforms like eBay, r/hardwareswap, and local classifieds often have gently used GPUs and cases at significant discounts.
- Wait for sales. Monitor deal-tracking sites like PCPartPicker and Slickdeals. Prices fluctuate by $20-$40 regularly.
- Skip the RGB case. Cases with LED fans cost more. A clean matte-black case with good airflow performs better than an RGB-lit case with restricted ventilation.
- Use integrated graphics temporarily. If you cannot afford a GPU on day one, the Ryzen 5 5500’s integrated graphics can handle esports titles while you save for a dedicated card.
- Reuse storage and peripherals. If you have an existing SSD or monitor from an older system, redirect that budget toward the GPU or RAM.
Common Mistakes to Avoid When Building a $500 Gaming PC

Even experienced builders sometimes trip over avoidable errors. Here are pitfalls you must watch out for when assembling a budget gaming computer.
- Underspending on the power supply. A low-quality PSU can damage every component in your system. Always choose a reputable brand with 80+ certification.
- Forgetting to enable XMP/DOCP in BIOS. Your RAM will default to 2133MHz unless you manually activate the rated speed profile in BIOS. This single step dramatically improves performance.
- Choosing a too-small case. A cramped case leads to thermal throttling. Make sure your chosen case fits the ATX or mATX motherboard and has adequate fan configuration.
- Ignoring storage speed. An HDD as a primary drive tanks load times across the board. An NVMe SSD is essential for a responsive system.
- Applying too much thermal paste. A pea-sized dot in the center of the CPU is all you need. Excess paste can seep onto the motherboard and cause shorts.
Future Upgrade Path for Your $500 Budget Gaming System
One of the biggest advantages of this build is its upgrade potential. Instead of replacing the entire system, you can focus on individual upgrades that compound in value over time.
- Year 1 upgrade: Add a second 500GB or 1TB SSD for expanded storage. Cost: $35-$55.
- Year 2 upgrade: Swap the GTX 1660 Super for an RTX 4060 or RX 7600. This nearly doubles ray tracing and 1080p performance. Cost: $200-$250.
- Year 3 upgrade: Replace the CPU with a Ryzen 5 7600X on the existing AM4 board (with a BIOS update) or migrate to an AM5 platform. Cost: $100-$200.
- Year 4 upgrade: Add 16GB more RAM and a higher-wattage PSU to support a flagship GPU. Cost: $80-$120.
This staggered approach means you never need to commit $500-plus to a single purchase. Instead, you spread investment over time while keeping the system relevant for four or more years.
Conclusion
Building a $500 gaming PC is one of the most rewarding projects a budget-conscious gamer can undertake. The combination of the AMD Ryzen 5 5500, GTX 1660 Super, and a carefully selected set of supporting components delivers genuine 1080p gaming enjoyment without compromising on quality or future-proofing. This $500 gaming PC build guide has given you the exact parts list, assembly order, budget allocation strategy, performance expectations, and upgrade roadmap to make confident decisions. The beauty of PC gaming is its modularity. Start with this foundation, follow the assembly steps precisely, avoid common pitfalls, and watch your budget rig grow into something truly impressive over the coming years. You do not need to spend a fortune to game in style. You just need a smart plan and the willingness to build it yourself.
Frequently Asked Questions
Can a $500 gaming PC handle AAA games at 1080p?
Yes, a well-built $500 gaming PC handles most AAA titles at 1080p with medium to high settings and maintains 50-65 FPS in demanding games like Cyberpunk 2077 and Hogwarts Legacy. Esports titles like CS2 and Valorant run at well over 200 FPS on high settings. The key is managing your expectations based on the specific game and optimizing in-game settings for the best balance between visual quality and performance.
What is the best GPU for a $500 budget gaming PC build?
The GTX 1660 Super remains the top recommendation for this budget because it offers 6GB of VRAM, strong 1080p performance, and excellent price-to-performance ratio. The AMD RX 6600 is a viable alternative that sometimes costs slightly less and offers comparable gaming performance. Both GPUs comfortably handle esports titles and most AAA games at 1080p medium-high settings with smooth frame rates above 60 FPS consistently.
Is it better to build a $500 PC or buy a prebuilt gaming system?

Building yourself offers significantly better value because every dollar goes toward the components rather than manufacturer markup. Prebuilt systems from major brands often charge a premium of 15-25% for assembly labor and bundled software. Additionally, building your own gives you full control over part quality, especially the power supply and motherboard, which are areas where prebuilt manufacturers frequently cut corners to hit aggressive price points.
How much does it cost to run a $500 gaming PC daily?
A system with this configuration draws roughly 250-300 watts under full gaming load. Running it for four hours per day at an average US electricity rate of $0.13 per kilowatt-hour costs approximately $4-$6 per month. Idle power consumption drops to around 60-80 watts, so light usage like web browsing and media streaming costs just a few dollars monthly. This is significantly cheaper than console gaming when you factor in game subscription services and online multiplayer fees.
Can I upgrade this $500 build to support 1440p gaming later?
Absolutely. The motherboard and CPU can support more powerful GPUs through a simple upgrade. Swapping the GTX 1660 Super for an RTX 4060 Ti or RX 7700 XT unlocks solid 1440p gaming at 60+ FPS in most titles. You may also need to upgrade the PSU to 550-650W depending on the new GPU’s power requirements. The AM4 motherboard supports these upgrades with a simple BIOS update, making this build an excellent long-term foundation for progressive performance scaling.
What operating system works best for a budget gaming PC?
Windows 10 Home remains a solid and widely compatible choice, and you can upgrade to Windows 11 for free using the Media Creation Tool even on unsupported hardware. Linux distributions like SteamOS and Pop!_OS are viable free alternatives if you primarily play Steam-compatible titles, though driver support for some newer games and anti-cheat systems still favors Windows. For most gamers, installing Windows 10 gives the best blend of compatibility, performance, and zero additional licensing cost since many system builders include activation workarounds that work reliably.